Description
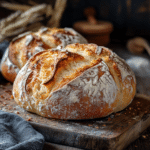
This Dutch Oven No-Knead Bread recipe is incredibly easy and produces a beautiful, crusty loaf with a soft, chewy interior. Minimal effort and simple ingredients yield bakery-quality results.
Ingredients
Scale
- 1 1/2 cups warm water (100-110°F / 38-43°C)
- 1 packet (2 1/4 teaspoons) active dry yeast, instant yeast, or rapid-rise yeast
- 1 1/2 teaspoons fine grain sea salt (non-iodized preferred, see notes), up to 2 teaspoons for a saltier loaf
- 3 1/4 cups (406g) all-purpose flour or bread flour, plus more for dusting (see notes)
Instructions
- Combine Water, Yeast, and Salt: In a large mixing bowl (or a large container with a lid), whisk together the warm water, yeast, and salt until the yeast and salt are mostly dissolved.
- Add Flour: Add the flour all at once to the water mixture.
- Mix Dough: Stir with a wooden spoon or spatula until a shaggy, sticky dough forms. Don’t worry about kneading; just make sure all the flour is incorporated and there are no dry spots. The dough will be messy and sticky.
- Adjust Consistency (If Needed):
- Too Wet: If the dough seems excessively wet and sticky (more like a thick batter than a dough), add more flour, 1-2 tablespoons at a time, until it reaches a shaggy, sticky consistency.
- Too Dry: If the dough seems too dry and crumbly, add more water, 1/2 tablespoon at a time, until it comes together.
- First Rise (Bulk Fermentation): Cover the bowl with a clean kitchen towel or plastic wrap (or place a lid on the container, slightly ajar). Let the dough rise in a somewhat warm place for 2-3 hours, or until it has doubled in volume. Note: If your kitchen is cold, you can preheat your oven to the lowest setting for a few minutes, then turn it off and place the covered bowl inside to rise.
- Optional Refrigeration: After the 2-3 hour rise, you have two options:
- Bake Immediately: Proceed to the next step.
- Refrigerate: For a more developed flavor, you can refrigerate the dough for up to 24 hours. Punch down the dough, reshape it gently into a ball, and place it back in the bowl (or a smaller, greased bowl). Cover tightly with plastic wrap and refrigerate. Let the dough come to room temperature for about 30-60 minutes before shaping and baking.
- Preheat Oven and Dutch Oven: 30 minutes to 1 hour before you’re ready to bake, preheat your oven to 450°F (230°C). Place your Dutch oven (with the lid on) inside the oven while it preheats. This is crucial for creating a crispy crust.
- Shape Dough: Generously dust a large piece of parchment paper with flour. Gently scrape the dough out of the bowl and onto the edge of the floured parchment paper. Shape the dough very gently into a rough loaf shape (round or oval, depending on your Dutch oven) by folding the edges of the dough up and over towards the center. Don’t worry about making it perfect; the no-knead nature of this bread means a rustic look is expected.
- Flip Dough: Use the edges of the parchment paper to carefully flip the loaf over so that the floured side is on top and the seam side is down. The loaf should now be in the center of the parchment paper.
- Score Dough (Optional): If desired, use a very sharp knife or a clean razor blade to score the top of the loaf. Make a few slashes, about 1/2-inch deep, across the entire top. This helps control the expansion of the bread during baking and creates a decorative pattern. A simple cross, a single long slash, or several parallel slashes all work well.
- Carefully Transfer to Dutch Oven: Carefully remove the very hot Dutch oven from the preheated oven. Remove the lid. Using the edges of the parchment paper as handles, carefully lower the dough (still on the parchment paper) into the hot Dutch oven.
- Bake (Covered): Place the lid back on the Dutch oven. Bake for 35 minutes at 450°F (230°C). If the dough was refrigerated, bake for 40 minutes covered.
- Bake (Uncovered): Carefully remove the lid from the Dutch oven. Continue baking, uncovered, for another 5-10 minutes, or until the crust is a deep golden brown and the internal temperature of the bread reaches 200-210°F (93-99°C). If the crust is browning too quickly, you can reduce the oven temperature slightly.
- Cool: Carefully remove the loaf from the Dutch oven (using the parchment paper as handles) and place it on a wire rack to cool completely. Cool for at least 10 minutes, and ideally for 30-60 minutes, before slicing. This allows the internal structure to set and prevents a gummy texture.
Notes
- Water Temperature: The water should be warm to the touch, but not hot (100-110°F / 38-43°C). Too hot, and it will kill the yeast; too cold, and the yeast won’t activate properly.
- Yeast: You can use active dry yeast, instant yeast, or rapid-rise yeast interchangeably in this recipe. There’s no need to proof the yeast separately.
- Salt: Non-iodized salt is preferred for bread baking, as iodine can sometimes inhibit yeast activity. However, if you only have iodized salt, it will still work.
- Flour: All-purpose flour or bread flour can be used. Bread flour will result in a slightly chewier loaf. The recipe author uses King Arthur All-Purpose flour, and other flours may yield different results.
- Rising Time: The rising time can vary depending on the temperature of your kitchen.
- Dutch Oven: A Dutch oven (4-7 quart, round or oval) is essential for creating the crispy crust and evenly baked interior. The enclosed environment traps steam, creating a similar effect to a professional bread oven.
- Parchment Paper: Parchment paper is crucial for transferring the dough to the hot Dutch oven and preventing it from sticking.
- Scoring: Scoring the loaf (making slashes on the top) is optional but recommended. It helps control the expansion of the bread during baking and creates a more aesthetically pleasing loaf.
- Cooling: Cooling the bread completely before slicing is important. This allows the internal structure to set, preventing a gummy texture.
- Storage: Store leftover bread in a paper bag at room temperature for up to 2 days. For longer storage, wrap the bread tightly in plastic wrap and then foil, and freeze for up to 2 months.