Description
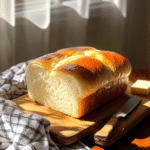
This Easy Milk Bread Loaf recipe yields a soft, fluffy, and slightly sweet bread with a tender crumb. It’s perfect for toast, sandwiches, or enjoying on its own. This recipe uses a simple shaping technique for a beautiful loaf.
Ingredients
Scale
- 500g (3 3/4 cups) bread flour, plus more for dusting (see notes)
- 40g (3 tablespoons) granulated sugar
- 1 1/2 teaspoons instant yeast
- 225g (a little bit less than 1 cup) cold water
- 115g (1/2 cup) cold milk (whole milk recommended)
- 9g (1 1/2 teaspoons) fine sea salt
- 25g (1 3/4 tablespoons) unsalted butter, softened
For Coating and Brushing:
- Unsalted butter, for greasing the pan and brushing the loaf
- All-purpose flour, for dusting the pan
Instructions
1. Make the Dough:
- Combine Dry Ingredients: In the bowl of a stand mixer fitted with the dough hook attachment (or a large mixing bowl if kneading by hand), combine the bread flour, sugar, and instant yeast. Whisk to combine.
- Add Wet Ingredients: Add the cold water and cold milk to the bowl.
- Mix and Knead (Initial): Knead on low speed with the dough hook (or by hand) until the ingredients come together to form a shaggy dough.
- Autolyse (Rest): Cover the mixing bowl with plastic wrap or a clean kitchen towel and let the dough rest for 30 minutes. This allows the flour to fully hydrate, resulting in a softer, more extensible dough.
- Soften Butter: While the dough is resting, cut the unsalted butter into 4 pieces and let it soften slightly at room temperature.
- Add Salt and Knead: After the 30-minute rest, add the salt to the dough. Knead on low speed for 1 minute.
- Add Butter: With the mixer running on low speed, add the softened butter, one piece at a time, allowing each piece to fully incorporate into the dough before adding the next.
- Knead (Final): Once all the butter is added, continue kneading the dough for 8-10 minutes (the recipe suggests 6 minutes on low speed and 1 minute on medium speed in a stand mixer), or until the dough passes the windowpane test (see notes). The dough should be smooth, elastic, and slightly sticky. It should stick to the bottom of the bowl but pull away from the sides.
2. First Rise (Bulk Fermentation):
- Shape Dough: Lightly grease a large bowl. With lightly buttered or oiled hands, remove the dough from the mixer bowl. Gently shape the dough into a ball by pulling the sides down and tucking them underneath.
- Rise: Place the dough ball, seam-side down, in the greased bowl. Cover the bowl tightly with plastic wrap or a clean kitchen towel. Let the dough rise in a warm place (ideally between 82°F and 90°F / 28°C and 32°C) for about 1 hour, or until it has almost doubled in size.
3. Shape the Loaf:
- Divide Dough: Transfer the risen dough to a lightly floured work surface. Do not punch down the dough. Gently press out any large air bubbles. Use a bench scraper or a sharp knife to divide the dough into three equal pieces.
- Shape into Balls: Gently shape each piece of dough into a ball.
- Rest: Cover the dough balls loosely with a damp kitchen towel or greased plastic wrap. Let them rest for 15 minutes. This relaxes the gluten and makes the dough easier to shape.
- First Roll and Shape: Working with one dough ball at a time, use a lightly floured rolling pin to roll the dough out into an oval shape. Then, starting at one end, tightly roll the oval up into a log.
- Rest. Cover and let it rest for another 15 minutes.
- Final Roll and Shape: Rotate each dough log 90 degrees. Roll each log out again into a long rectangle. Then, starting at one short end, tightly roll the rectangle up into a cinnamon roll shape.
4. Second Rise (Proofing):
- Prepare Loaf Pan: Grease a 10×5-inch loaf pan with butter. Lightly dust the greased pan with flour, tapping out any excess.
- Place in Pan: Place the three rolled-up dough pieces, seam-side down, side-by-side in the prepared loaf pan.
- Proof: Cover the loaf pan loosely with greased plastic wrap. Let the dough rise in a warm place until it fills 80-90% of the pan (this will take about 1-1.5 hours).
5. Bake the Bread:
- Preheat Oven: During the last 20 minutes of the proofing time, preheat your oven to 375°F (190°C). Position a rack in the lower third of the oven.
- Bake (Covered): Bake for 15 minutes.
- Bake (Uncovered): Loosely cover with a piece of foil, bake for another 15-20 minutes, until golden brown.
- Check for Doneness: The bread is done when it’s a deep golden brown and the internal temperature reaches 190-200°F (88-93°C).
- Cool: Remove the bread from the oven. Immediately after baking, drop the pan on the counter from a height of about 2 inches. This helps to prevent the bread from shrinking as it cools.
- Remove and cool: Transfer the bread to a wire rack immediately. Brush the top of the hot loaf with melted butter. Let the bread cool completely before slicing and serving.
Notes
- Bread Flour: Bread flour has a higher protein content than all-purpose flour, which results in a chewier bread with a better rise. You can use all-purpose flour, but the texture may be slightly different. The recipe author uses all-purpose.
- Instant Yeast: Instant yeast can be added directly to the dry ingredients. If using active dry yeast, you’ll need to proof it first: combine the yeast with the warm water and a pinch of the sugar and let it sit for 5-10 minutes, until foamy.
- Windowpane Test: The windowpane test is a way to check if the dough has been kneaded enough. To perform the test, take a small piece of dough and stretch it gently between your fingers. If the dough is properly kneaded, you should be able to stretch it thin enough to see light through it without the dough tearing.
- Rising Time: Rising times can vary depending on the temperature of your kitchen.
- Loaf Pan Size: A 10×5-inch loaf pan is recommended.
- Cooling: Cooling the bread completely before slicing is important for the best texture.
- Storage store at room temp.